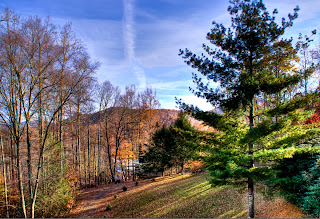
Having devoted a majority of my posts to HDR using the Nikon D90, it got me to thinking about how you could accomplish getting the required minimum exposures on the Sony A100.
A little Google search provided the answer. This is how the photo was exposed:
1. I set the exposure mode (metering mode to multiple segment)
2. Attached my shutter release cable.
3. Set the Mode to "P" for program mode -- some refer this to Professional Mode.
4. Note the Aperture called for by the "P" mode.
5. Switch the Mode setting to "A" for aperture and set the aperture to the value noted in 4.
6. Press the A100 AV button on the top rear of the camera and set the AV to -2.0.
7. On a tripod of course, press the shutter button (in my case the shutter release cable).
8. Press the AV button again and set the AV value to 0.0.
9. Press the shutter release button to expose the second photo.
10. Press the AV button again and set the AV value to +2.0.
11. Press the shutter release button to expose the third and final exposure photo.
Now what do you do with these three photos?
I use Photomatix Pro 3.2 to combine the photos into a "tone-mapped image". There are other programs that will perform that function and the new Adobe Photoshop CS5 will do this function too. But my experience with CS5 has been that to achieve the results that I get with Photomatix takes too long and slider settings are not easily interperted. None of CS5's default settings are of interest to me.
My approach to HDR is to increase the camera's ability to see detail in the shadows and the highlights -- and not to try to turn the photo into a "Starwars" image.
There are some impressive "Starwar Images" that I have viewed but it is not for me.
For more information on Photomatix Pro go here: Photomatix Pro.
Click on the photo to fill your screen.


No comments:
Post a Comment